Behind the Scenes: Scientifically Adding Some Jingle to the Holidays
by Eric Schmidt | Updated: 12/17/2024 | Comments: 0
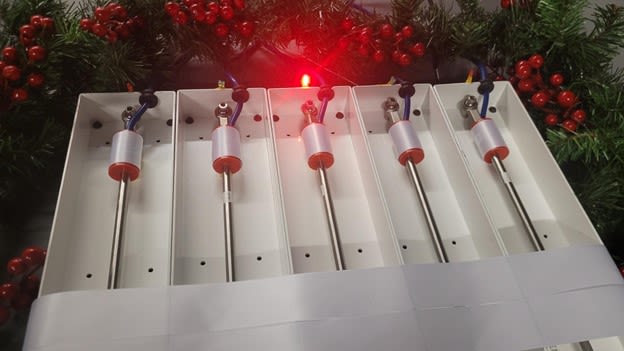
Music has always been a part of my life—ten years of piano, six of oboe, and countless performances in bands and symphonies. So, when I joined Campbell Scientific and learned about vibrating wire sensors, my brain got excited for the musical potential. The result? Crackmeters playing “Jingle Bells.” Watch the video below:
In this blog article, I’ll explain how the video came together in six steps using the Campbell Scientific CR6 Automated Monitoring Platform.
#1 – Building the Setup
In the video, the first thing you'll notice is the setup we built at Campbell Scientific featuring five Geokon 4420 crackmeters. We use these devices extensively in our training classes to show people how easy it is to attach a sensor and get a reading. For this holiday project, the most important feature was the small black wheel at the end, which allowed precise adjustments to the displacement. Using this toggle, I was able to tune each sensor to a specific note.
#2 – Determining the Frequency Range
All vibrating wire sensors have a frequency range, which limited the number of notes I could use for the song. The setup I worked with further restricted this range. To determine the note range for each crackmeter, I attached them to a CR6, adjusted the displacement to the lowest point, and checked the frequency using our LoggerNet software. Then, I increased the tension to the highest point and recorded that frequency as well. This process helped me identify the playable range for each instrument. A quick search for a "frequency note chart" then revealed which notes would work for the song.
#3 – Choosing the Song and Tuning the Notes
After searching for holiday songs with six notes or fewer, I found the perfect match: the chorus of “Jingle Bells.” I used the tension wheel of each crackmeter apparatus to tune to each note that I would need. By waiting for a new scan, I could see the frequency change, and through a time-consuming, iterative process, I was able to tune each crackmeter to a very exact note—down to three decimal places!
#4 – Programming the Song
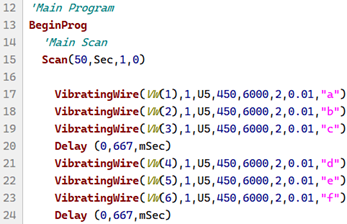
The next part was tricky. I had to create a program in CRBasic that would play the song in a loop that corresponded with the scan rate. Below is a screenshot of part of that program. You can see the delay function being used, which allowed for longer notes to be held. At the end, I had to count the number of notes and delays and then multiply that number by 2/3 of a second to figure out how long my scan rate should be.
#5 – Adding a Visual Component
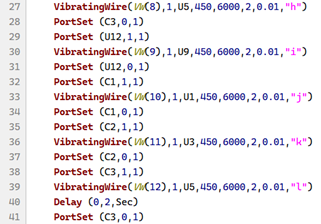
After the crackmeters were wired into the CR6, I played the song for my coworkers, who were very excited! But then I realized something—vibrating wire sensors don’t really do anything visually when read by an automated monitoring platform. I needed a way to show people what was happening without needing to explain it. To fix this, I used LED lights from our training classes and updated the program so the lights would flash along with each note. Below is an image of the updated code. Using the CR6’s universal and control ports, I was able to create a light show that synced perfectly with the music.
#6 – Making It Festive
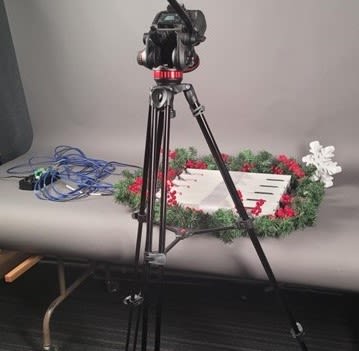
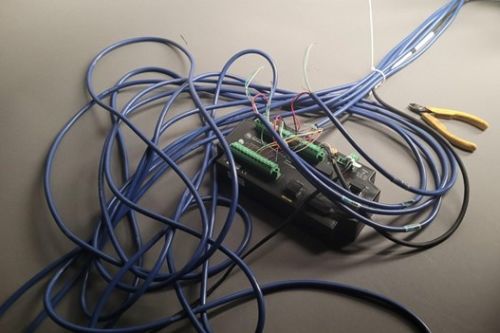
When it finally came time to shoot the video, I worked with our videographer to create the festive display around the setup, tie the cables together (not quite in a bow), and present this as best as possible. Here are a couple photos of what that process looked like:
Wrapping Up the Holiday Project
This project was a fun way to combine my passion for music with the technology we develop at Campbell Scientific. It’s a reminder of how creativity and engineering can intersect to create something truly unique. I hope you enjoyed this behind-the-scenes look, and I’d love to hear your thoughts!
Please reach out to our application engineers or sales team if you have questions about our CR6 Automated Monitoring Platform or how it can help with your current or future projects.


 Eric Schmidt is an Application Engineer in the Infrastructure Group at Campbell Scientific, Inc. He works with customers on the technical aspect of building measurement systems; helps provide trainings for all of Campbell Scientific’s international offices; and attends conferences related to dams, mines, and geotechnology. He received his bachelor’s degree in biological engineering from Utah State University. In his spare time, he enjoys canyoneering and composing music.
Comments
Please log in or register to comment.